Nigella’s Coca Cola Cupcakes

Lately everywhere I go, everywhere I look I see Coca Cola Cake….. The latest one I saw on Sabina kookt! Growing up I only used to (and basically still do) drink Pepsi, so it was against my basic principle. Intrigued by the idea of putting cola into cake and convinced that I had to use Coca Cola (why else would the cake have been named Coca Cola Cake?), I finally caved in and bought a can of Coca Cola. Last week I got around to baking Nigella Lawson’s Coca Cola Cake, except I decided to turn the cake into cupcakes yet again. The recipe can be found in Nigella Lawson’s book ‘How to be a Domestic Goddess’.

 Took the cupcakes to work where they were a huge hit. The cola adds to the moisture of the cake, but the flavor of the cola gets lost: you’re left with deliciously moist chocolate cupcakes. I will be making these again!

Coca-cola Cupcakes with Glaze
makes 12 to 16 cupcakes 


200 g plain flour
250 g sugar
1/2 tsp baking soda
1/4 tsp salt
1 large egg
125 ml buttermilk
1 teaspoon vanilla
125 g unsalted butter
2 tbs cocoa powder
175 ml Coca-cola
Preheat the oven to 350F.

In a large bowl, combine the flour, sugar, baking soda and salt. Beat the egg, buttermilk and vanilla in in a measuring jug. In a heavy-based saucepan, melt the butter, cocoa and Coca-cola, heating it gently. Pour into the dry ingredients, stir well with a wooden spoon, and then add the liquid ingredients from the jug, beating until it is well blended.

Pour into a muffin tin that has been greased or lined with papers and bake for 15 minutes until a tester comes out clean.

Glaze

225 g icing sugar
2 tbs butter
3 tbs Coca-cola
1 tbs cocoa powder
1/2 tsp vanilla

Sieve the icing sugar and set aside. In a heavy-based saucepan, combine the butter, Coca-Cola and cocoa and stir over a low heat until the butter has melted. Remove from the heat, add the vanilla, and spoon in the sieved icing sugar, beating as you do, until you’ve got a good, spreadable, but still runny, icing.

Pour over the cupcakes while they are still warm, and leave to cool.

Hollandse Appeltaart

This Friday E. turned 34 years old, to celebrate I made him two cakes. One chocolate cake, filled with chocolate cuttercream, both made from mix. I covered the cake with chocolate fondant and decorated it with a World of Warcraft logo made from marzipan.

The other cake I made was Hollandse Appeltaart, a.k.a. Dutch Apple Pie. It differs from apple pies from other countries, because the filling contains raisins, cinnamon and lemon juice and the crust is not a tart crust but something between pâte brisée and cake. Traditionally, this apple pie is made with a Dutch variety of apples called Goudrenet, which is a tart (but not too much) apple. If you can’t find those use any other kind of tart apple, but don’t use apples that are too tart, otherwise you’ll end up with a sour-tasting apple pie. I like to add some dried cranberries to the apple pie and I usually use more cinnamon than the recipe says ’cause I love cinnamon!

Holandse Appeltaart

Filling
1 kg tart apples, like Goudrenet (which I used) or Granny Smith
Juice of 1 medium-sized lemon, freshly squeezed
70 g caster sugar
2 tsp ground cinnamon
50 g raisins
50 g raisins

Dough
250 g unsalted butter, at room temperature, plus extra for greasing the pan
250 g all-purpose flour
250 g self-raising flour
250 g caster sugar
2 large eggs
½ tsp lemon zest, freshly grated
1 Tbsp water
Pinch of salt

1 Tbsp dried breadcrumbs

Glaze
70 g apricot jam
30 ml (2 Tbsp) white rum (or water)

Preparation
Put the raisins in a small bowl along with a splash of cinnamon liquor and let them soak for 15 minutes.

Prepare the filling
In the meantime, in a large bowl, add the lemon juice. Start peeling, coring and cutting the apples into small pieces, placing them in the bowl as you go. Stir them around in the lemon juice every once in a while, so that they don’t discolor. Add the raisins to the bowl along with the sugar and cinnamon. Mix well with a wooden spoon or spatula. Set bowl aside.

Butter the bottom and sides of your spring-form pan generously and preheat your oven to 180-185 degrees Celsius.

Prepare the dough
In the bowl of a stand mixer (or in a large bowl), beat the butter on medium speed with the paddle attachment (or with your hand-held mixer), until softened and creamy, for 1-2 minutes. Sift all-purpose and self-raising flour directly into the bowl and add the sugar, salt, lemon zest, water and the egg. Mix all the ingredients with your hands and knead until you have a smooth, shiny, soft yet pliable dough that’s not sticking to your hands. It will come together very quickly and easily. If it’s too dry, add a teaspoon of water and if it’s sticky, add a little bit of all-purpose flour. Cut off a third of the dough and leave it aside.

Take the rest of the dough, shape it into a ball and place it in the middle of the spring-form pan. Using the back of your hand, press the dough over the bottom and up the sides of the pan. The dough should come up to 2/3 of the height of the pan. Try to spread the dough as evenly as possible.
Sprinkle the base of the pastry case with the dried breadcrumbs, which are used to soak up the juices from the apples, so that the base doesn’t become soggy.

Mix the filling once more with a spoon or spatula and empty it into the pan. It should fill the whole pastry case.

Take the piece of dough you left aside and divide it into smaller pieces. Roll each piece into long, thin round strips and use them to decorate the tart, lattice style.

Place the pan on the middle rack of the oven and bake for 45-50 minutes, until the crust takes on a golden-brown color.

Prepare apricot glaze
Ten minutes before the pie is ready, prepare the glaze by putting the apricot jam and the rum (or water) in a small saucepan. Heat the jam over medium heat, until it comes to the boil and then immediately remove from the heat.

When the apple pie is ready, take it out of the oven and immediately glaze it, using a pastry brush. Allow the pie to slightly cool inside the pan and then remove the sides of the pan. Allow to cool completely and if you want, move the pie onto a platter or cake stand.

The pie is eaten either warm or at room temperature. It is best eaten the day you make it, as well as the following day.
It can be kept at room temperature, covered, for 2 days and as the days pass, the crust will become softer and more cake-like.

Vanilla Cupcakes with Baileys Buttercream

Today I found some leftover Champagne  Buttercream in my fridge, to use that up I baked some Vanilla Cupcakes. I looked for a recipe in ‘The Hummingbird Bakery Cake Days‘, a cookbook my brother gave me for birthday last year.  The method of making the batter was quite different: the butter, sugar, flour, baking powder and salt are mixed in a bowl and the milk, eggs and vanilla essence are mixed in a jug after which they are added to the bowl. The recipe says it makes 12-16 cupcakes. I ended up with 12 regular size cupcakes and 24 mini-cupcakes.

Before I started baking I took the Champagne Buttercream out of the fridge to taste if it was still good, but because the buttercream was too hard I couldn’t try it. I figured I would start baking and by the time the cupcakes had cooled down the buttercream would have probably be soft enough to taste. My assumption was correct, unfortunately the buttercream tasted a bit off… I can’t quite explain what was wrong with it, but it definitely tasted different so I decided to throw it out and make some new buttercream. My eye fell on the almost empty bottle of Baileys and I knew I had to make Baileys Buttercream!

Vanilla Cupcakes
as found in The Humingbird Bakery Cake Days
makes 12-16 cupcakes

80 gram (3 oz) unsalted butter
280 gram (10 oz) caster sugar (I used granulated sugar)
240 gram (8 1/2 oz) plain flour
1 tbsp baking powder
1/2 tsp salt (I think I accidentally only added 1/4 tsp)
240 ml (8 1/2 floz) whole milk (I used semi-skimmed milk)
1/2 tsp vanilla essence
2 large eggs

Preheat the oven to 190 degrees Celsius (375 degrees Fahrenheit, Gas mark 5) and line a muffin tin with muffin cases.

Using a hand-held electric whisk or a freestanding electric mixer with the paddle attachment, slowly beat together the butter, sugar, flour, baking powder and salt until the ingredients are well mixed and resemble fine breadcrumbs.

Mix together the milk, vanilla essence and eggs by hand in a jug. With the whisk or mixer still on a low speed, pour three-quarters of the milk mixture into the dry ingredients and mix well, scraping down the sides of the bowl to make sure all the ingredients are fully incorporated. Add the rest of the milk mixture and beat again, now on a medium speed, until the batter is smooth.

Spoon the batter into the muffin cases, up to about two-thirds full. Pop in the oven and bake for 18-20 minutes (my regular size cupcakes needed 18 minutes, the mini cupcakes needed 12 minutes) or until the sponges feel springy when you touch them. Leave to cool slightly before removing from the tin and placing on a wire rack to cool completely.

Baileys Buttercream

125 gram butter (softened)
250 gram powdererd sugar
4 tbsp Baileys

 Cream the butter, add the powdered sugar and mix until it’s well incorporated. Add Baileys and mix well.

Goodbye 2011 and Welcome 2012: Champagne Cupcakes with Champagne Buttercream to ring in the New Year

2011 has been quite a year… I quit being a part-time student and found myself a wonderful  boyfriend. I visited Food Blogger Connect 2011 in London and got to meet a lot of great food bloggers in real life. At work my manager found a new job and I had to get used to a new one. Friends had babies and got married. Now the New Year has come. A time to reflect on what went well (love!) and what didn’t (blogging and health). As to New Year’s resolutions? I have a few…. They include eating healthier and exercising more regularly in the hope of losing some weight and blogging more regularly. So Friday I had my first workout at the gym in ages and tomorrow my diet starts. Why tomorrow and not today? Because a very wise woman told me one should never start dieting on January 1st.

As to blogging more regularly, I decided to rejoin Tuesdays with Dorie. The group had been closed to new members until they finished Baking: From My Home to Yours, which they did in December 2011. TWD is now taking on a new book, Baking with Julia, starting in February 2012. The group will be opened up for all to join in on the fun. And since I already owned the book I thought it would be a great idea to rejoin!!

Here are the five recipes on my blog that were most visited in 2011:

Toblerone Shortbread Cookies

I first baked these for my Christmas Cookie platters in 2010, and they were so popular that I repeated them this year.


Baileys Brownies

What can I say? Chocolate and Baileys, the perfect combination….


Arretje’s Cake

A traditional Dutch no-bake cake made for Di’s Handmade Loaves.


Bluefinger Cookies

An original Dutch cookie from Zwolle that, like my blogs name, referes to the nickname of the inhabitants of Zwolle.

Gazpacho Shots

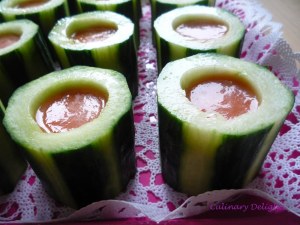
Another recipe from 2010: I served these cute Gazpacho Shots at my 30th birthday party.

Now on to today’s recipe. As is the case every year, I was invited to Heino to celebrate New Year’s Eve with some carbid schieten. Carbid schieten translated into English would mean Carbide Shooting.  Carbide is a rocky material (CAC2) that is made of coke and slacked lime, by heating the two in an electric oven. If you put water with the carbide it produces an explosive gas! Now you take a milkcan (with a nicely fitting lid) and put the milkcan almost flat on the ground with the front a bit higher as the back , get the lid off, and put some carbide in milkcan. Add some water into the milkcan and quickly put the lid back on, a rubber ball works as well. Make sure nobody  is in front of the milkcan and carefully put the tip of the torch near the hole in the back of the milkcan. The shooting then follows.

This is my SIL shooting carbide last year, fortunately it was less cold this year!

At this Carbide shooting there’s always a lot of food and alcohol and I decided to bring a bit of both to the party in the form and shape of….. Champagne Cupcakes with Champagne Buttercream! I found the recipe at Starting to Simmer and adapted it as I found the champagne flavor to be understated and I wanted to make miniature cupcakes. I used a pink champagne, which is why my buttercream has a pale pink color.

Champagne Cupcakes
adapted from Starting to Simmer
makes 48 miniature cupcakes

1/2 cup butter, softened
1 cup sugar
2 eggs
1 tsp vanilla
1 3/4 cups flour
1/2 tsp baking soda
1/4 tsp baking powder
1/4 tsp salt
1/2 cup sour cream
1/2 cup champagne
Preheat oven to 350 degrees.  In a bowl cream together butter and sugar with an electric mixer (or in bowl of stand mixer fitted with paddle attachment) until light and fluffy. Add eggs one at a time beating well after each addition.  Add vanilla and mix.
 In a medium sized bowl mix together flour, baking soda, baking powder and salt, set aside. In a separate bowl whisk together champagne and sour cream (mixture will fizz and bubble). Add flour 1/3 at a time, alternating with champagne and sour cream mixture.
Fill cupcake liners with level 1/4 cup of batter. Bake for 17-20 minutes until tops are just beginning to brown. Cool completely and brush the tops of the cupcakes with some champagne before frosting.
Champagne Buttercream Frosting
2 cup champagne plus one tablespoon
1 cup butter softened
2 1/2 cups confectioners sugar
Place 2 cups of champagne in a small saucepan, and simmer over medium high heat until it has reduced to 4 tablespoons. Remove from heat and allow to cool.
Cream softened butter. Add confectioners sugar in three batches, using a medium high speed. Add in reduced champagne and additional tablespoon champagne and mix well.


Virtual Cookie Exchange: Chocolate Munchies

Two weeks ago I went to a book market with my BF. In advance I limited myself to buying only one regular book and one cookbook, otherwise I would have probably come home with a truckload of books and an empty bank account. I had already picked up a copy of  La Maison du Chocolat: Timeless Classics with a Twist. I had visited one of the shops of La Maison du Chocolat in Paris last August and now wanted this book. The book has wonderful recipes, paired with amazing pictures.

As we strolled past the other stalls at the bookmarket, my BF pointed out The Golden Book of Cookies to me, although the book looked great I explained to him that I had given myself a purchase limit. E. then decided he would buy this book for me. Ofcourse I had to let him pick a recipe to try from the book, which I was happy to 🙂 E. decided on the Chocolate Munchies.

The Munchies are absolutely delicious, both E. and my dad approved of them. I want to submit these Chocolate Munchies the second annual virtual cookie exchange hosted by Di of Di’s Kitchen Notebook. Be sure to check out the roundup of everyone’s treats, which will probably be on there around 11 December. 


Chocolate Munchies
from The Golden Book of Cookies
makes 25 – 30 cookies

1 cup all purpose flour
2 tbsp unsweetened cocoa powder
1 tsp baking powder
1/4 tsp cinnamon
1/8 tsp salt
1/2 cup butter, softened
1 large egg yolk
2 oz semisweet chocolate, coarsely chopped

Preheat the oven to 350 degrees Fahrenheit. place parchment paper on your cookie sheet.

In a small bowlmix together the all purpose flour, unsweetened cocoa powder, baking powder, cinnamon and salt.Cream the butter and sugar in a large bowl, add the egg yolk beating until just blended. Mix in the dry ingredients.

Drop teaspoons of cookie dough on the cookie sheet  and bake them for 12-15 minutes. Let the cookies cool completely.

Melt the chopped chocolate au bain marie and drizzle the melted chocolate over the cookies. Let the chocolate set.

Enjoy!

Pumpkin Butterscotch Cookies


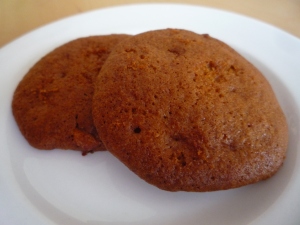
A while ago I made this Pasta with Mushroom and Pumpkin-Gorgonzola Sauce and I had some pumpkin puree left over, so I decided to use that puree to bake some delicious cookies. Lisa, my friend from Canada, brought over some Butterscotch chips for me when she visited last Spring and when I found this recipe over on Joy the Baker, I knew I had found the perfect recipe to use them in. My cookies look a bit different than Joy’s, but they still tasted great. These cookies are not the crispy kind, they are more cakey. I love the combination of the pumpkin with the sweetness of the butterscotch and so did my dad and my coworkers!

Pumpkin Butterscotch Cookies

As found on Joy the Baker
Makes about 2 dozen cookies

2 cups all-purpose flour
1½ tsp. baking powder
1 tsp. baking soda
½ tsp. salt
1 tsp. ground cinnamon
2 large eggs
1 cup sugar
½ cup vegetable or canola oil
1 cup pumpkin puree
1 tsp. vanilla extract
1 cup butterscotch chips (or chocolate chips)

Preheat the oven to 325° F.  Line two baking sheets with parchment paper or silicone baking mats.  In a small bowl combine the flour, baking powder, baking soda, salt and cinnamon; whisk to blend.  In a the bowl of an electric mixer combine the eggs and sugar.  Beat on medium-high speed until smooth and light in color, about 1 minute.  Blend in the oil, pumpkin puree, and vanilla extract until well combined.  With the mixer on low speed, mix in the dry ingredients just until incorporated.  Gently fold in the butterscotch chips with a spatula.

Drop mounds of dough onto the prepared baking sheets (I used a medium-sized dough scoop), spacing them a few inches apart.  Bake, rotating the sheets halfway through baking, until the tops feel set and a toothpick inserted in the center comes out dry, about 14-16 minutes.  Allow to cool on the baking sheets 5-10 minutes before transferring to a wire rack to cool completely.  Store in an airtight container.

Posted in Cookies. 1 Comment »

Handmade Loaves: Arretje’s Cake

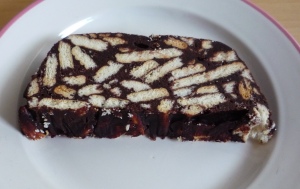
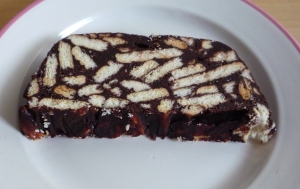
Remember Di of Di’s Kitchen Notebook? Di who hosted the Sundae Sunday last July and the Virtual Cookie Exchange last December? Well, she came up with another great idea: Handmade Loaves. She asked some bloggers if they would like to bake a loaf of their own picking and then she would organize a roundup. I decided to make something easy with ingredients I had on hand: a non-bake loaf cake called Arretje’s Cake.

Arretje’s Cake is a cold cake that is traditionally eaten in different Dutch regions. The name comes from a cartoon figure called Arretje Nof that was used as advertisement for the butter brand of the Nederlandse Olie Fabrieken (NOF) (Dutch Oil Factories).

Though the exact ingredients differ per region and recipe, the base is the same. The ingredients are mixed and then need to rest in the fridge to stiffen up. Here’s my favorite recipe. You can use margarine, but I prefer to use butter as it makes the Arretje’s Cake much tastier! Be sure to cut the cake into thin slices, this cake is very rich.


Arretje’s Cake

200 grams  (dry) biscuits
200 grams butter
200 grams fine sugar
2 eggs
2 tablespoons cocoa

Break the biscuits into pieces.
Add the cocoa and the sugar.
Stir in the eggs.
Warm the butter (don’t boil it!!!!) and mix it through.

Line a loaf tin with plastic wrap and fill the tin with the mixture.
Press down well.
Let the tin rest in the fridge for a whole day.
Remove the cake from the tin and cut into thin slices.

Pumpkin Dinner: Pasta with Mushrooms and Pumpkin-Gorgonzola Sauce

Since this spring a friend of mine has a vegetable garden where she grows loads of different vegetables. Her crop of pumpkins was amazing, she had so many pumpkins that she gifted me two of them. I pureed both the pumpkins and while I was looking at my bookmarked pumpkin recipes, I received an email from Phyl of Of Cabbages & King Cakes with a question if I wanted to participate in a Pumpkin Dinner Round Up. Of course this sounded like fun! I ended up making Pasta with Mushrooms and Pumpkin-Gorgonzola Sauce and Pumpkin-Butterscotch Cookies. The cookies will be posted later, today I’m sharing the recipe for the Pasta with Mushrooms and Pumpkin-Gorgonzola Sauce.

I wasn’t able to find evaporated milk, so I used sour cream. The flavor of the pumpkin and gorgonzola was very subtle, next time I will probably use a bit more gorgonzola.


Pasta with Mushrooms and Pumpkin-Gorgonzola Sauce

adapted from Cooking Light
serves 6 

1 lb. uncooked pasta, small shapes work best
2 tablespoons olive oil
2 cups thinly sliced mushrooms, any variety
1 large onion, thinly sliced
4 garlic cloves, minced
1 teaspoon ground sage or fresh sage, chopped
1 (12 oz.) can evaporated milk (I used a cup of sour cream)
1 1/2 tablespoons cornstarch
1 1/2 tablespoons cold water
1/2 cup (2 oz.) crumbled Gorgonzola cheese
1/2 cup pumpkin
1 teaspoon salt
1/2 teaspoon freshly ground black pepper
1/8 teaspoon grated whole nutmeg

Cook pasta according to package directions, omitting salt and fat.  Keep warm.  Heat oil in a large skillet over medium-high heat.  Add mushrooms, onion and garlic; cover and cook 3 minutes.  Uncover, cook 5 minutes or until tender, stirring occasionally.  Combine sage and milk in a medium saucepan over medium heat.  Bring to a simmer.  Combine cornstarch and water in a small bowl, stirring with a whisk.  Add cornstarch mixture and cheese to milk mixture; stirring with a whisk.  Cook 2 minutes or until thick and smooth, stirring constantly.  Remove from heat; stir in pumpkin, salt, pepper and nutmeg.  Add pasta to skillet.  Pour sauce over pasta and mushroom mixture, toss well to combine.

Leslie’s Cinnamon Cookies for Grown Ups


Here’s another post from the archives. Last year I participated in a Virtual Cookie Exchange, hosted by Di of Di’s Kitchen Notebook. Leslie of Lethally Delicious made these wonderful Cinnamon Cookies that I simply had to make, as I’m crazy about cinnamon! If you love cinnamon too, I suggest you hurry into the kitchen and whip up a batch of these lovely cookies. They are soooo good!


Cinnamon Cookies for Grown Ups

1 3/4 cups (8 3/4 ounces) all purpose flour
1/2 teaspoon baking soda
14 tablespoons (7 ounces) unsalted butter
1/2 cup (3 1/2 ounces) granulated sugar
3/4 cups (5 1/4 ounces) packed dark brown sugar
1/2 teaspoon kosher salt
2 teaspoons vanilla extract
1 large egg
1 large egg yolk
1 1/2 cups cinnamon chips

1. Adjust oven rack to middle position and heat oven to 350 degrees.

2. Line 2 large (18- by 12-inch) baking sheets with parchment paper. Whisk flour and baking soda together in medium bowl; set aside.

3. Heat 10 tablespoons butter in a deep 10-inch skillet or saucepan over medium-high heat until melted, about 2 minutes. Continue cooking, swirling pan constantly until butter is dark golden brown and has nutty aroma and the milk solids are very brown, 1 to 3 minutes. Remove skillet from heat and, using heatproof spatula, transfer browned butter to large, deep heatproof bowl. Immediately stir remaining 4 tablespoons butter into hot butter until completely melted.

4. Add both sugars, salt, and vanilla to bowl with butter and whisk until fully incorporated. Add egg and yolk and whisk until mixture is smooth with no sugar lumps remaining, about 30 seconds. Let mixture stand 3 minutes, then whisk for 30 seconds. Repeat process of resting and whisking 2 more times until mixture is thick, smooth, and shiny. Using rubber spatula or wooden spoon, stir in flour mixture until just combined. Stir in cinnamon chips and give dough a final stir to ensure no flour pockets remain.

5. Portion out dough: 1 tablespoon will give you 2″ cookies and 2 tablespoons of dough yields 3-3 1/2″ cookies. Arrange 2 inches apart on prepared baking sheets.

6. Bake cookies 1 tray at a time until cookies are golden brown and still puffy, and edges have begun to set but centers are still soft, 9 to 12 minutes, rotating baking sheet halfway through baking. Transfer baking sheet to wire rack; cool cookies completely before serving.

Makes about 3 dozen 2″ cookies

Oatmeal Dark Kisses Cookies

There they were, sitting in my Drafts Folder: some draft posts for cookies I bakes for the Christmas Platters I gave to friends, family and coworkers last year. These cookies were one of the twelve different cookies I had on my Christmas Platters, they sounded pretty healthy as they contained oatmeal and I ended up using Dark Hershey Kisses instead of Milk Chocolate.
Hershey Oatmeal Dark Kisses Cookies
recipe adapted from Hershey’s
makes about 6 dozen cookies

1 bag (13 oz.) Hershey’s Kisses Brand Dark Chocolates
1/2 cup (1 stick) butter or margarine, softened
1/2 cup shortening
1 cup granulated sugar
1 cup packed light brown sugar
2 eggs
2 cups all-purpose flour
1 teaspoon baking soda
1 teaspoon salt
2-1/4 cups quick-cooking rolled oats
1 cup chopped nuts
Heat oven to 375 degrees Fahrenheit. Remove wrappers from chocolate pieces.
Beat butter, shortening, granulated sugar and brown sugar in a large bowl until fluffy. Add eggs; beat well. Stir together flour, baking soda and salt; add to butter mixture, beating until well blended. Stir in rolled oats and nuts. Shape rounded teaspoons of dough into 1-inch balls. Place on ungreased cookie sheet.
Bake 8 to 10 minutes or until light brown. Remove from oven; immediately place chocolate piece in center of each cookie, pressing down lightly. Carefully remove cookies from cookie sheet to wire rack. Cool completely.